Today we’re going to see how to manage workflow notifications in
D365 Supply Chain Management.
Indeed, there are 3 methods that we will discover during 3
chapters: Via the calendar, via the action center or via e-mails.
Via the calendar
The first one is the basic method, which is visible directly on
the home screen.
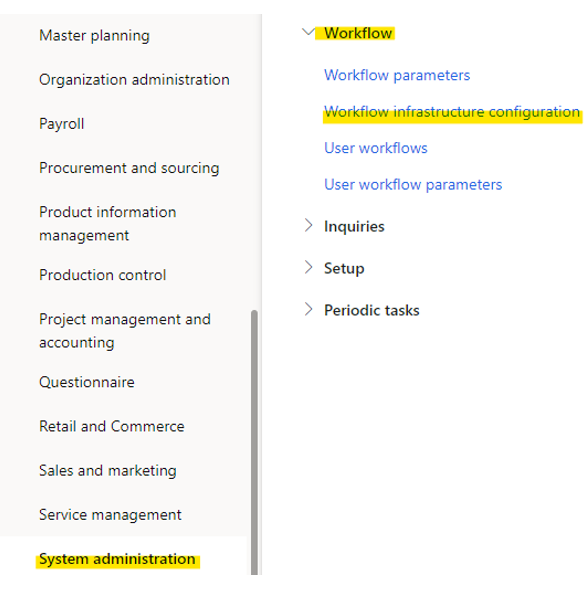
The only condition is that you must have launched the workflow
batch in « System administration \ WorkFlows \ Workflow
infrastructure configuration » :
There are some HyperText links under the calendar :

Via Action Center
The second one is via the action center.
For this method a little more configuration is necessary but
nothing too complicated.
Indeed in the options of the user it is necessary to go to check
the box « Send notifications to Action Center » :

This has the effect of adding this type of notification:

and if we open the pane on the right we have more detail :

Note that there is sometimes a delay before the appearance of
the notification.
Via e-mail
The last method is to send email notifications.
And here … it’s not the same story anymore.
3 methods of sending emails are configurable : EML, Exchange et
SMTP.
Here we will focus on the SMTP method.
Let’s start by looking at what to do with user options.
there is two things to do :
·
Configure the email
address that will receive the notifications. If this field is empty,
notifications will not be sent:

·
Check the case
« Send notifications in email » :

This is all we have to do at the user level (except that it must
be done for all users who want to receive email notifications).
Now let’s go to the system settings.
The first step is to configure the sending of emails for SMTP.
To do this, go to the module « Systeme Administration \
Setup \ E-mail \ E-mail Setup» :

In the configuration section, activate the SMTP service, set
SMTP as the default provider of batch messaging and optionally limit the size
of attachments.

In the « SMTP Parameter » section, contact your
favorite IT specialist to obtain the server address, port, user name and
password required for sending :

Once the configuration is done, it is always useful to send a
test email to validate that everything is good.
The second step is to start a batch process which will take care
of sending emails.
For that, go to the module « System Administration \
Periodic tasks \ Email processing \ Email distributor batch » :

Configure a frequency according to the needs of the company
(every hour, 10 minutes, etc.).
We come to the 3rd part, and not the simplest, the creation of a
mail template. Which is actually where we are going to define the formatting of
our mail.
To create it, it will depend on the scope of the Workflow.
If the Workflow is shared between all the entities, this will be
done in the module “System Administration \ Setup \ E-mail \ System email
templates” :

If the Workflow is specific to the entity, this will be done in
the module “Organization administration \ Setup \ Organization email templates”
:

Both bring us to a similar screen in which we have to create a
new line:

Email ID : the Template name, who will be choose in the workflow
(next step)
Email description : free text to explain the ID (no
impact)
Sender Name : name that will appear in the email as the sender
Sender Email: mandatory address but which will be replaced via SMTP
Then create a line for each of the languages used in your
company like this :

Choose the language, then enter the subject. The Subject will be
the title of the email.
To insert the body of the email, click on “Email message” or on
“Edit”:

And there surprise! D365 asks you to load an HTML file …

A little tour on the web to find how to create an html file and
here is a simple test:
Use the following link to compose your own html : https://html5-editor.net/

I’m not hiding you that I haven’t yet figured out how to find
and assign the variables between the “%” and that it would be a good idea to
dig a little deeper into the subject.
The result of this file is the email below:

Did you think you had finished?
Go still a little effort we are in the last straight line…
We just have to associate our Template in our workflow.
To do this, open the workflow and look at the global parameters
of the workflow:
 |
Just to clarify, if you have a header workflow that calls a line
workflow, the Template can be only configured in the header workflow.
On the other hand if you configure it only at line level it will
not work…
And now, your users will now be able to receive their email
notifications
I hope I didn’t give you a headache too much,


Setting up email notifications in D365 F&O workflows is a smart way to ensure timely approvals and task tracking. Just like fine-tuning PC Builds, getting the right configuration—SMTP setup, email templates, and batch jobs—makes all the difference in smooth performance.
ReplyDelete