Azure SQL Database: Use SQL Server Management Studio to connect and query data
SQL Server Management Studio (SSMS) is an integrated environment for managing any SQL infrastructure, from SQL Server to SQL Database for Microsoft Windows. This quickstart demonstrates how to use SSMS to connect to an Azure SQL database, and then use Transact-SQL statements to query, insert, update, and delete data in the database.
Prerequisites
This quickstart uses as its starting point the resources created in one of these quickstarts:
- An Azure SQL database. You can use one of these techniques to create a database:
Install the latest SSMS
Before you start, make sure you have installed the newest version of SSMS.
SQL server connection information
Get the connection information needed to connect to the Azure SQL database. You will need the fully qualified server name, database name, and login information in the next procedures.
- Log in to the Azure portal.
- Select SQL Databases from the left-hand menu, and click your database on the SQL databases page.
- On the Overview page for your database, review the fully qualified server name as shown in the following image. You can hover over the server name to bring up the Click to copy option.

- If you forget your server login information, navigate to the SQL Database server page to view the server admin name. If necessary, reset the password.
Connect to your database
Use SQL Server Management Studio to establish a connection to your Azure SQL Database server.
Important
An Azure SQL Database logical server listens on port 1433. If you are attempting to connect to an Azure SQL Database logical server from within a corporate firewall, this port must be open in the corporate firewall for you to successfully connect.
- Open SQL Server Management Studio.
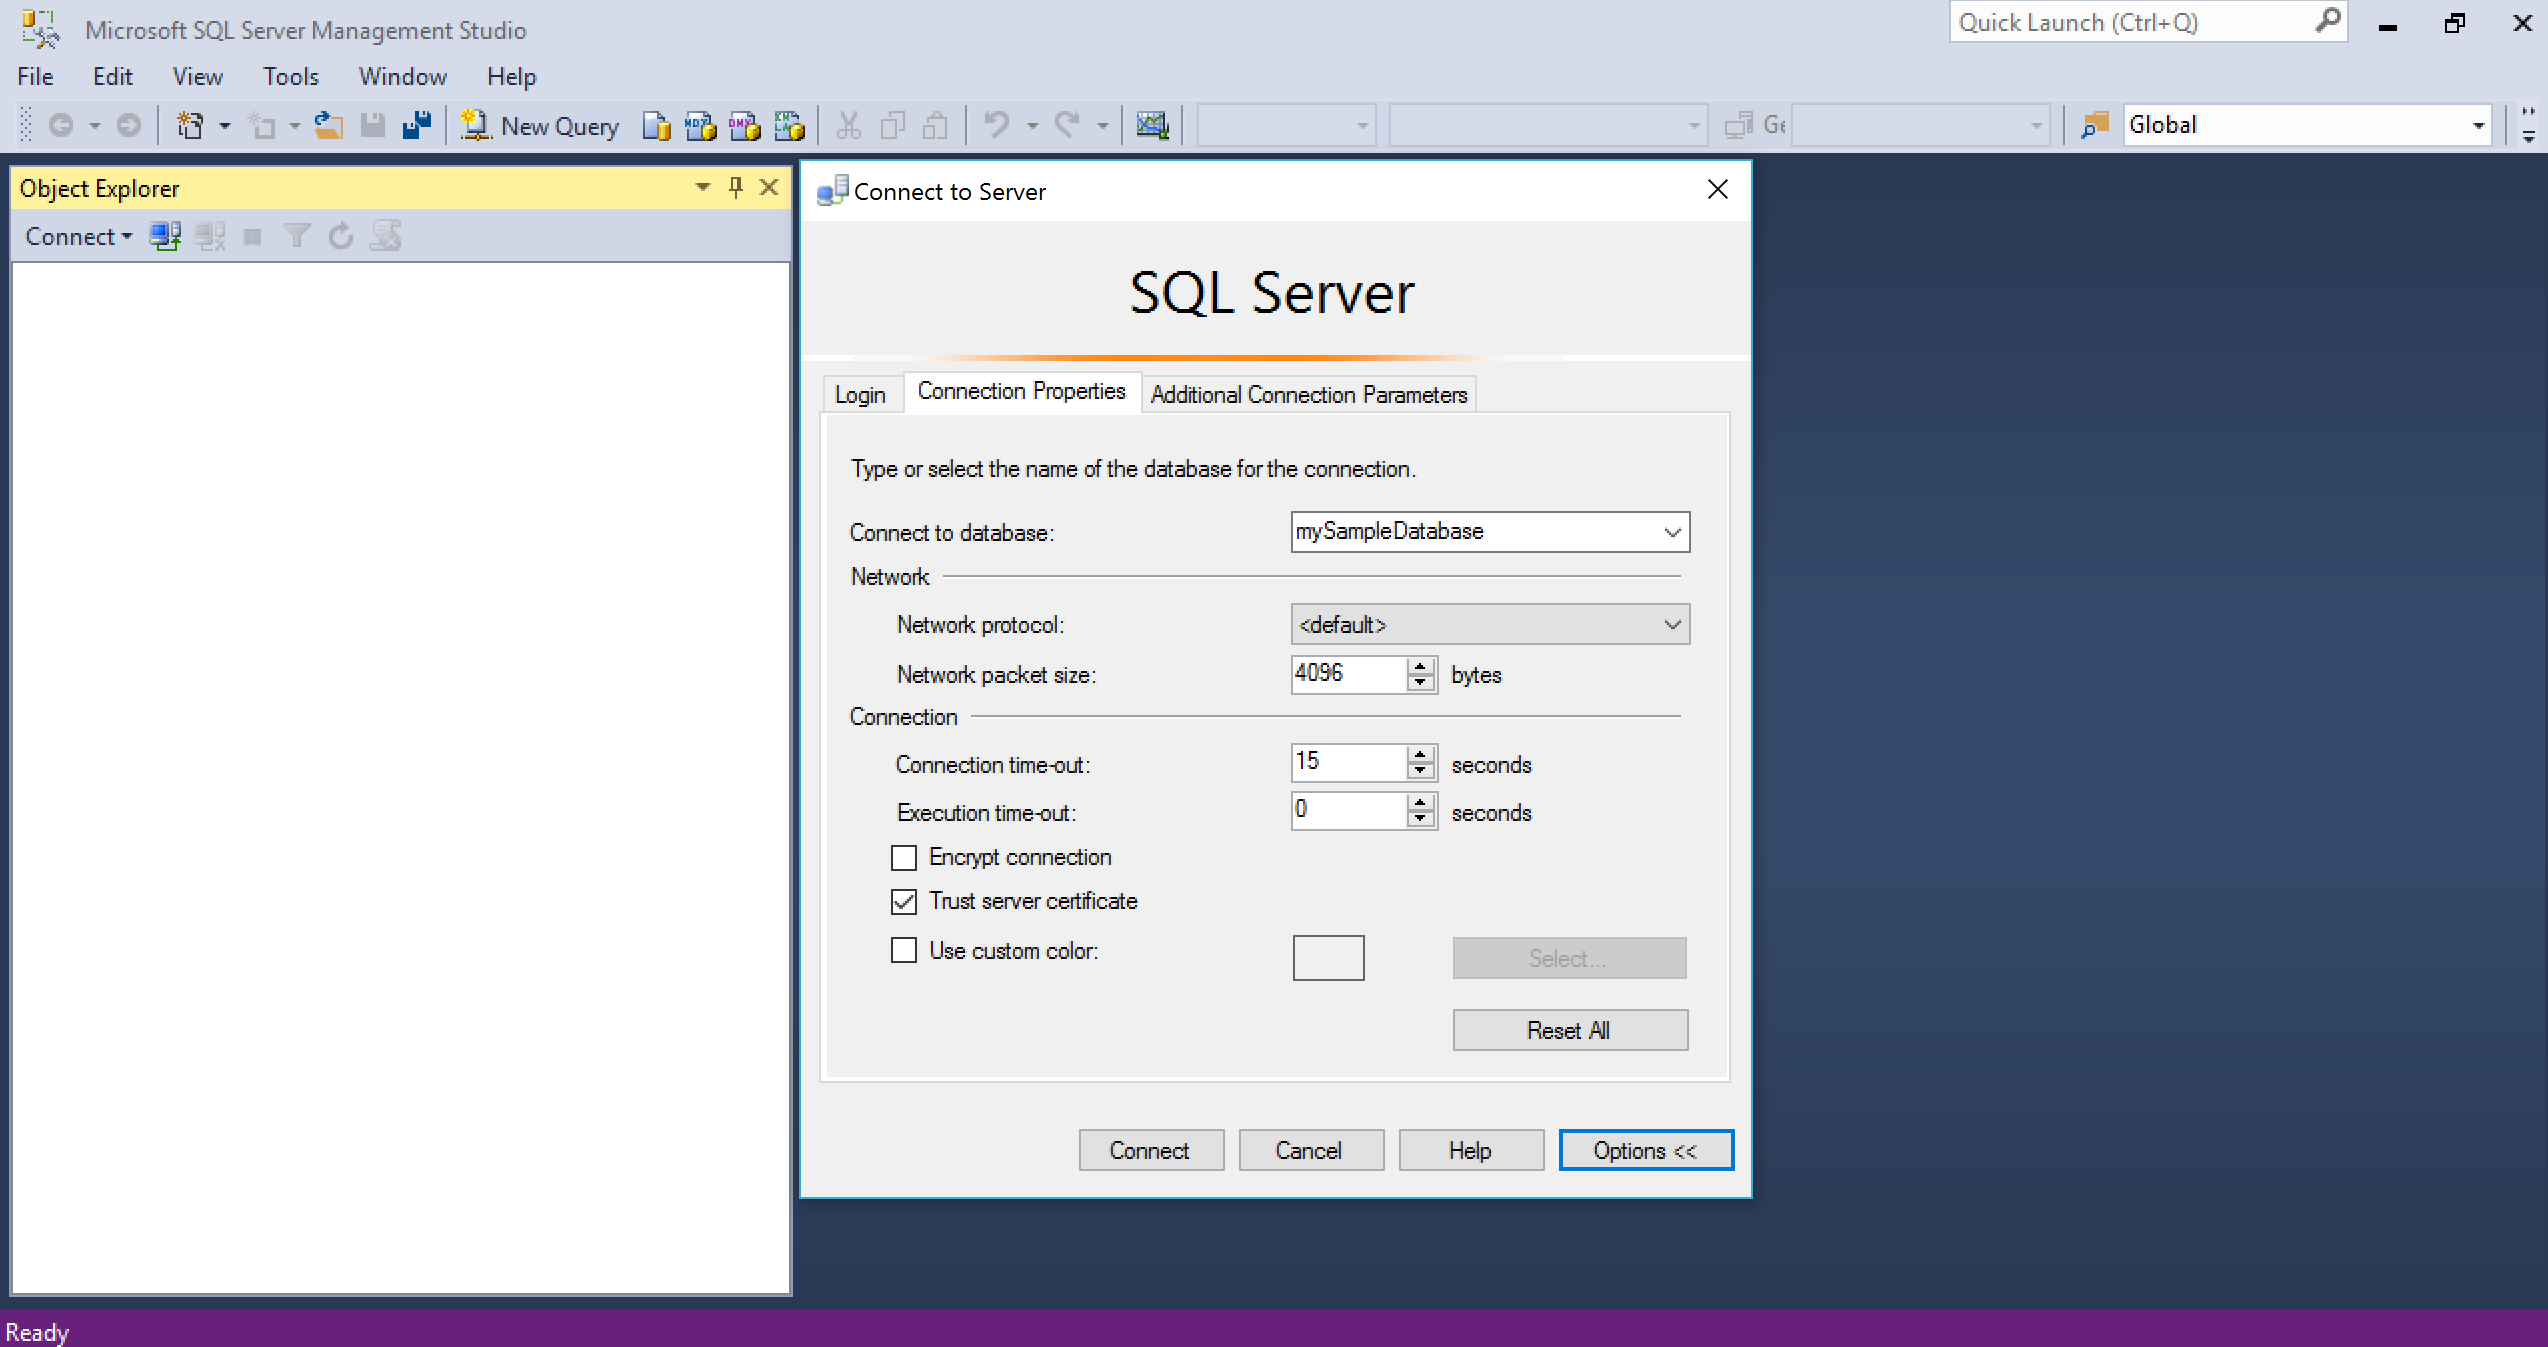
- In the Connect to Server dialog box, enter the following information:
Setting Suggested value Description Server type Database engine This value is required. Server name The fully qualified server name The name should be something like this: mynewserver20170313.database.windows.net. Authentication SQL Server Authentication SQL Authentication is the only authentication type that we have configured in this tutorial. Login The server admin account This is the account that you specified when you created the server. Password The password for your server admin account This is the password that you specified when you created the server. 
- Click Options in the Connect to server dialog box. In the Connect to database section, enter mySampleDatabase to connect to this database.

- Click Connect. The Object Explorer window opens in SSMS.

- In Object Explorer, expand Databases and then expand mySampleDatabase to view the objects in the sample database.
Query data
Use the following code to query for the top 20 products by category using the SELECT Transact-SQL statement.
- In Object Explorer, right-click mySampleDatabase and click New Query. A blank query window opens that is connected to your database.
- In the query window, enter the following query:SQL
SELECT pc.Name as CategoryName, p.name as ProductName FROM [SalesLT].[ProductCategory] pc JOIN [SalesLT].[Product] p ON pc.productcategoryid = p.productcategoryid; - On the toolbar, click Execute to retrieve data from the Product and ProductCategory tables.

Insert data
Use the following code to insert a new product into the SalesLT.Product table using the INSERT Transact-SQL statement.
- In the query window, replace the previous query with the following query:SQL
INSERT INTO [SalesLT].[Product] ( [Name] , [ProductNumber] , [Color] , [ProductCategoryID] , [StandardCost] , [ListPrice] , [SellStartDate] ) VALUES ('myNewProduct' ,123456789 ,'NewColor' ,1 ,100 ,100 ,GETDATE() ); - On the toolbar, click Execute to insert a new row in the Product table.

Update data
Use the following code to update the new product that you previously added using the UPDATE Transact-SQL statement.
- In the query window, replace the previous query with the following query:SQL
UPDATE [SalesLT].[Product] SET [ListPrice] = 125 WHERE Name = 'myNewProduct'; - On the toolbar, click Execute to update the specified row in the Product table.

Delete data
Use the following code to delete the new product that you previously added using the DELETE Transact-SQL statement.
- In the query window, replace the previous query with the following query:SQL
DELETE FROM [SalesLT].[Product] WHERE Name = 'myNewProduct'; - On the toolbar, click Execute to delete the specified row in the Product table.

Actual Post: https://docs.microsoft.com/en-us/azure/sql-database/sql-database-connect-query-ssms
No comments:
Post a Comment