Wednesday, 27 June 2018

ExecuteReader: CommandText property has not been initialized in Dynamics AX 365/ AX 7.0

I got the below error while processing the XML files by using the data entities.

Reason: Tag is missing in the XML file. In my case <Document> tag is missing.  I was defined the data entity with this tag and it was missing in the XML.

<headerstart>
<Name></Name>
</headerend>

Solution: Add the missing <Document> tag in the XML and reprocess the file.

<Document>
     <headerstart>
         <Name></Name>
      </headerend>
</Document>

Tuesday, 12 June 2018

your client ip does not have access to the server. sign in to an azure error

I got the below error while access the Dynamics 365 PROD DB from my DEV box.

your client ip does not have access to the server. sign in to an azure error

Reason: Dev box IP was not whitelisted in the PROD instance.

Solution:

Below is the query to add the IP addresses to the firewall table(sys.database_firewall_rules) to access the database from outside.

Run the below query to see existing IP's
select * from sys.database_firewall_rules;


I executed the below queries to add the IP addresses to the table.

-- Create database-level firewall setting for only for one IP 0.0.0.4 EXECUTE sp_set_database_firewall_rule N'Example DB Setting 1', '0.0.0.4', '0.0.0.4'; -- Update database-level firewall setting to create a range of allowed IP addresses EXECUTE sp_set_database_firewall_rule N'Example DB Setting 1', '0.0.0.4', '0.0.0.6';

Use what is my ip in google for knowing your public IP.
Note: My AX is on cloud and we created a custom screen in AX to run the queries.

Below are the links helped me.
https://docs.microsoft.com/en-us/sql/relational-databases/system-stored-procedures/sp-set-database-firewall-rule-azure-sql-database?view=azuresqldb-current
https://docs.microsoft.com/en-us/azure/sql-database/sql-database-firewall-configure

SQL query to extract primary address from CUSTTABLE in AX2012/Dynamics 365 operations

Hi,

Below is the the query we can for the customers primary postal address.


--For all addresses
 select CUSTTABLE.ACCOUNTNUM, DIRPARTYTABLE.NAME, Address.ADDRESS,Address.COUNTRYREGIONID 
 from CUSTTABLE 
 left outer join DIRPARTYTABLE ON DIRPARTYTABLE.RECID = CUSTTABLE.PARTY 
 left outer join LOGISTICSLOCATION ON LOGISTICSLOCATION.RECID = DIRPARTYTABLE.RECID 
 left outer join LOGISTICSPOSTALADDRESS AS Address ON Address.LOCATION = LOGISTICSLOCATION.RECID 
 Order by CUSTTABLE.ACCOUNTNUM 


--For primary address
 select CUSTTABLE.ACCOUNTNUM, DIRPARTYTABLE.NAME, Address.ADDRESS,Address.COUNTRYREGIONID  
 from CUSTTABLE  
 left outer join DIRPARTYTABLE ON DIRPARTYTABLE.RECID = CUSTTABLE.PARTY  
 left outer join LOGISTICSLOCATION ON LOGISTICSLOCATION.RECID = DIRPARTYTABLE.PRIMARYADDRESSLOCATION  
 left outer join LOGISTICSPOSTALADDRESS AS Address ON Address.LOCATION = LOGISTICSLOCATION.RECID  
 Order by CUSTTABLE.ACCOUNTNUM 

Thursday, 7 June 2018

Azure SQL Database: Use SQL Server Management Studio to connect and query data

Azure SQL Database: Use SQL Server Management Studio to connect and query data

SQL Server Management Studio (SSMS) is an integrated environment for managing any SQL infrastructure, from SQL Server to SQL Database for Microsoft Windows. This quickstart demonstrates how to use SSMS to connect to an Azure SQL database, and then use Transact-SQL statements to query, insert, update, and delete data in the database.

Prerequisites

This quickstart uses as its starting point the resources created in one of these quickstarts:

Install the latest SSMS

Before you start, make sure you have installed the newest version of SSMS.

SQL server connection information

Get the connection information needed to connect to the Azure SQL database. You will need the fully qualified server name, database name, and login information in the next procedures.
  1. Log in to the Azure portal.
  2. Select SQL Databases from the left-hand menu, and click your database on the SQL databases page.
  3. On the Overview page for your database, review the fully qualified server name as shown in the following image. You can hover over the server name to bring up the Click to copy option.
    server-name
  4. If you forget your server login information, navigate to the SQL Database server page to view the server admin name. If necessary, reset the password.

Connect to your database

Use SQL Server Management Studio to establish a connection to your Azure SQL Database server.
Important
An Azure SQL Database logical server listens on port 1433. If you are attempting to connect to an Azure SQL Database logical server from within a corporate firewall, this port must be open in the corporate firewall for you to successfully connect.
  1. Open SQL Server Management Studio.
  2. In the Connect to Server dialog box, enter the following information:
    Setting    Suggested valueDescription 
    Server typeDatabase engineThis value is required.
    Server nameThe fully qualified server nameThe name should be something like this: mynewserver20170313.database.windows.net.
    AuthenticationSQL Server AuthenticationSQL Authentication is the only authentication type that we have configured in this tutorial.
    LoginThe server admin accountThis is the account that you specified when you created the server.
    PasswordThe password for your server admin accountThis is the password that you specified when you created the server.
    connect to server
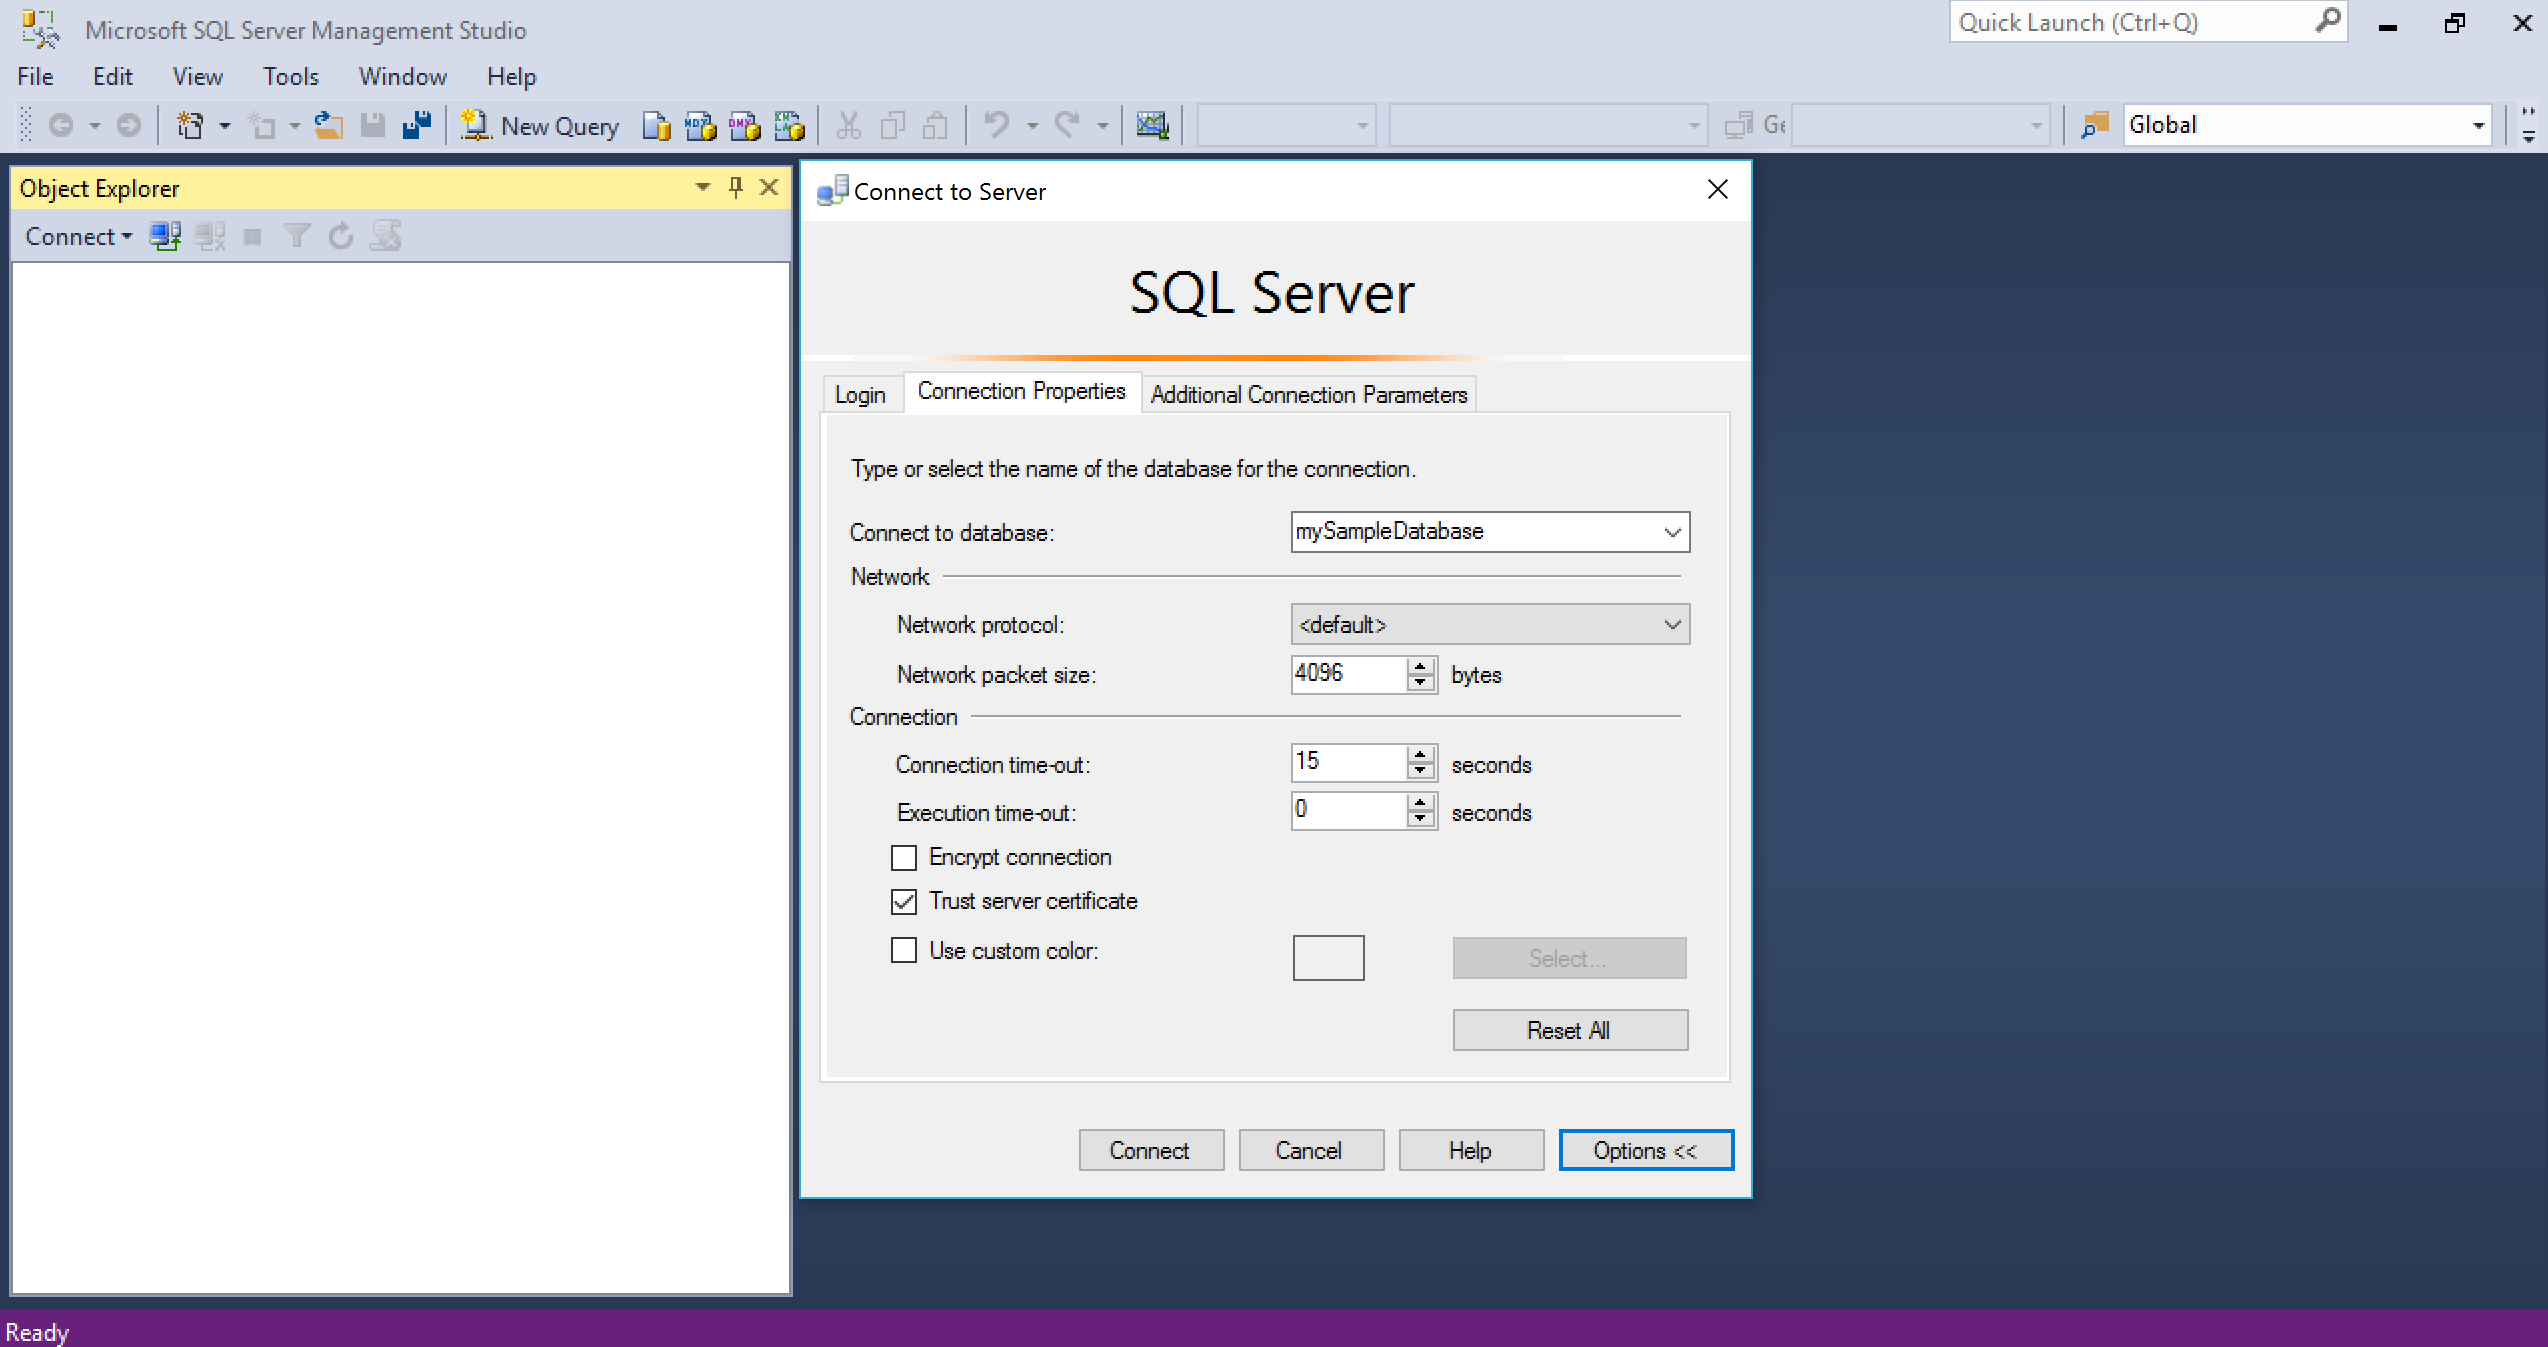
  3. Click Options in the Connect to server dialog box. In the Connect to database section, enter mySampleDatabase to connect to this database.
    connect to db on server
  4. Click Connect. The Object Explorer window opens in SSMS.
    connected to server
  5. In Object Explorer, expand Databases and then expand mySampleDatabase to view the objects in the sample database.

Query data

Use the following code to query for the top 20 products by category using the SELECT Transact-SQL statement.
  1. In Object Explorer, right-click mySampleDatabase and click New Query. A blank query window opens that is connected to your database.
  2. In the query window, enter the following query:
    SQL
    SELECT pc.Name as CategoryName, p.name as ProductName
    FROM [SalesLT].[ProductCategory] pc
    JOIN [SalesLT].[Product] p
    ON pc.productcategoryid = p.productcategoryid;
    
  3. On the toolbar, click Execute to retrieve data from the Product and ProductCategory tables.
    query

Insert data

Use the following code to insert a new product into the SalesLT.Product table using the INSERT Transact-SQL statement.
  1. In the query window, replace the previous query with the following query:
    SQL
    INSERT INTO [SalesLT].[Product]
            ( [Name]
            , [ProductNumber]
            , [Color]
            , [ProductCategoryID]
            , [StandardCost]
            , [ListPrice]
            , [SellStartDate]
            )
      VALUES
            ('myNewProduct'
            ,123456789
            ,'NewColor'
            ,1
            ,100
            ,100
            ,GETDATE() );
    
  2. On the toolbar, click Execute to insert a new row in the Product table.
    insert

Update data

Use the following code to update the new product that you previously added using the UPDATE Transact-SQL statement.
  1. In the query window, replace the previous query with the following query:
    SQL
    UPDATE [SalesLT].[Product]
    SET [ListPrice] = 125
    WHERE Name = 'myNewProduct';
    
  2. On the toolbar, click Execute to update the specified row in the Product table.
    update

Delete data

Use the following code to delete the new product that you previously added using the DELETE Transact-SQL statement.
  1. In the query window, replace the previous query with the following query:
    SQL
    DELETE FROM [SalesLT].[Product]
    WHERE Name = 'myNewProduct';
    
  2. On the toolbar, click Execute to delete the specified row in the Product table.
    delete
Actual Post: https://docs.microsoft.com/en-us/azure/sql-database/sql-database-connect-query-ssms

Connect to SQL Data base with Visual Studio and SSDT

Use Visual Studio to query Azure SQL Data Warehouse in just a few minutes. This method uses the SQL Server Data Tools (SSDT) extension in Visual Studio.

Prerequisites

To use this tutorial, you need:

1. Connect to your SQL Data Warehouse

  1. Open Visual Studio 2013 or 2015.
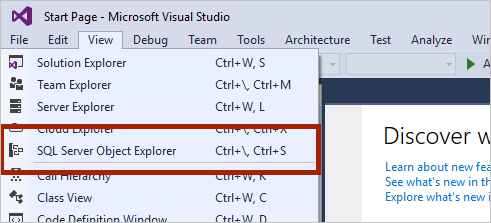
  2. Open SQL Server Object Explorer. To do this, select View > SQL Server Object Explorer.
    SQL Server Object Explorer
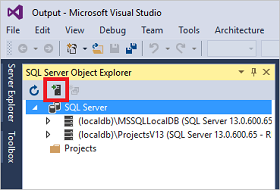
  3. Click the Add SQL Server icon.
    Add SQL Server
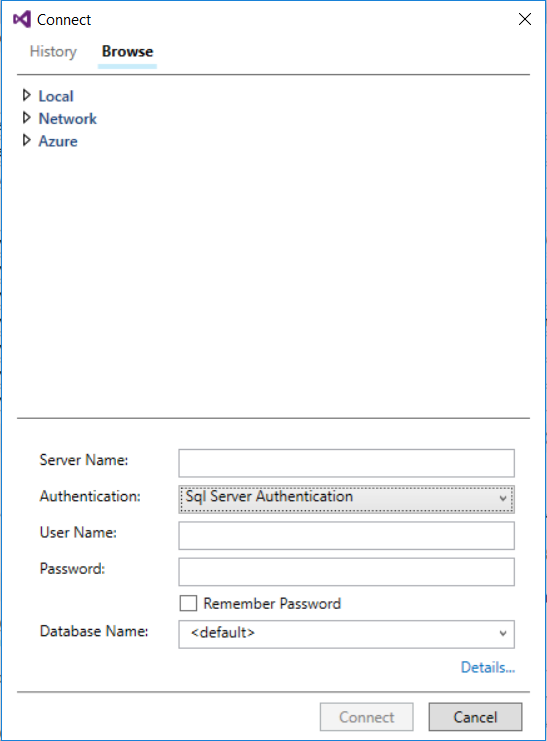
  4. Fill in the fields in the Connect to Server window.
    Connect to Server
    • Server name. Enter the server name previously identified.
    • Authentication. Select SQL Server Authentication or Active Directory Integrated Authentication.
    • User Name and Password. Enter user name and password if SQL Server Authentication was selected above.
    • Click Connect.
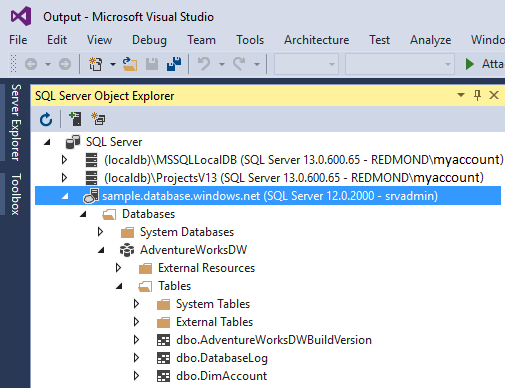
  5. To explore, expand your Azure SQL server. You can view the databases associated with the server. Expand AdventureWorksDW to see the tables in your sample database.
    Explore AdventureWorksDW

2. Run a sample query

Now that a connection has been established to your database, let's write a query.
  1. Right-click your database in SQL Server Object Explorer.
  2. Select New Query. A new query window opens.
    New query
  3. Copy this TSQL query into the query window:
    SQL
    SELECT COUNT(*) FROM dbo.FactInternetSales;
    
  4. Run the query. To do this, click the green arrow or use the following shortcut: CTRL+SHIFT+E.
    Run query
  5. Look at the query results. In this example, the FactInternetSales table has 60398 rows.
    Query results
Actual Post: https://docs.microsoft.com/en-us/azure/sql-data-warehouse/sql-data-warehouse-query-visual-studio

Azure database level firewall queries

sp_set_database_firewall_rule (Azure SQL Database)

Creates or updates the database-level firewall rules for your Azure SQL Database. Database firewall rules can be configured for the master database, and for user databases on SQL Database. Database firewall rules are particularly useful when using contained database users. For more information, see Contained Database Users - Making Your Database Portable.

Syntax


sp_set_database_firewall_rule [@name = ] [N]'name'  
, [@start_ip_address =] 'start_ip_address'  
, [@end_ip_address =] 'end_ip_address'
[ ; ]  

Arguments

[@name = ] [N]'name'
The name used to describe and distinguish the database-level firewall setting. name is nvarchar(128) with no default value. The Unicode identifier N is optional for SQL Database.
[@start_ip_address =] 'start_ip_address'
The lowest IP address in the range of the database-level firewall setting. IP addresses equal to or greater than this can attempt to connect to the SQL Database instance. The lowest possible IP address is 0.0.0.0. start_ip_address is varchar(50) with no default value.
[@end_ip_address =] 'end_ip_address'
The highest IP address in the range of the database-level firewall setting. IP addresses equal to or less than this can attempt to connect to the SQL Database instance. The highest possible IP address is 255.255.255.255. end_ip_address is varchar(50) with no default value.
The following table demonstrates the supported arguments and options in SQL Database.
Note
Azure connection attempts are allowed when both this field and the start_ip_address field equals 0.0.0.0.

Remarks

The names of database-level firewall settings for a database must be unique. If the name of the database-level firewall setting provided for the stored procedure already exists in the database-level firewall settings table, the starting and ending IP addresses will be updated. Otherwise, a new database-level firewall setting will be created.
When you add a database-level firewall setting where the beginning and ending IP addresses are equal to 0.0.0.0, you enable access to your database in the SQL Database server from any Azure resource. Provide a value to the name parameter that will help you remember what the firewall setting is for.

Permissions

Requires CONTROL permission on the database.

Examples

The following code creates a database-level firewall setting called Allow Azure that enables access to your database from Azure.
-- Enable Azure connections.  
EXECUTE sp_set_database_firewall_rule N'Allow Azure', '0.0.0.0', '0.0.0.0';  
The following code creates a database-level firewall setting called Example DB Setting 1 for only the IP address 0.0.0.4. Then, the sp_set_database firewall_rule stored procedure is called again to update the end IP address to 0.0.0.6, in that firewall setting. This creates a range which allows IP addresses 0.0.0.4, 0.0.0.5, and 0.0.0.6 to access the database.

-- Create database-level firewall setting for only IP 0.0.0.4  
EXECUTE sp_set_database_firewall_rule N'Example DB Setting 1', '0.0.0.4', '0.0.0.4';  

-- Update database-level firewall setting to create a range of allowed IP addresses
EXECUTE sp_set_database_firewall_rule N'Example DB Setting 1', '0.0.0.4', '0.0.0.6';  

Adding a newline into a string in C# and X++

Below is the sample code we can use for  adding a newline after every occurrence of "@" symbol in the string in C#   using System...