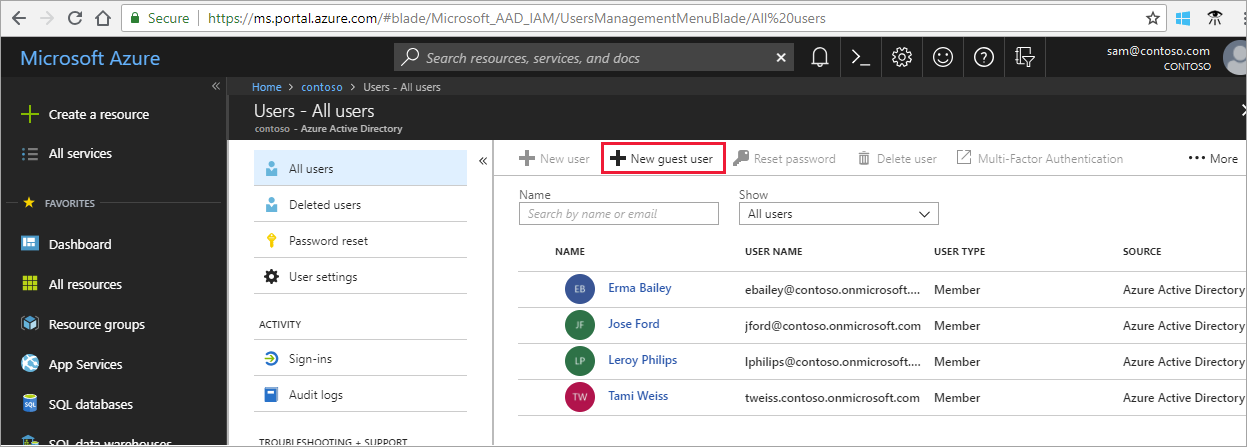
- Sign in to the Azure portal as an Azure AD administrator.
- In the navigation pane, select Azure Active Directory.
- Under Manage, select Users.
- Select New guest user.
- Under User name, enter the email address of the external user. Optionally, include a welcome message. For example:
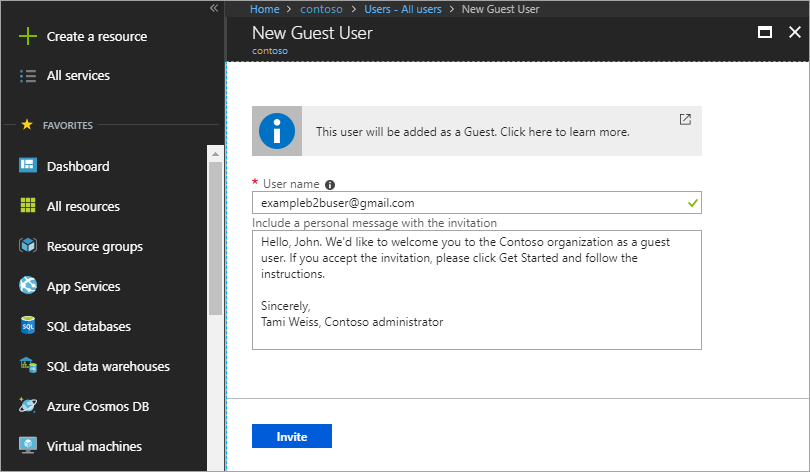
- Select Invite to automatically send the invitation to the guest user.
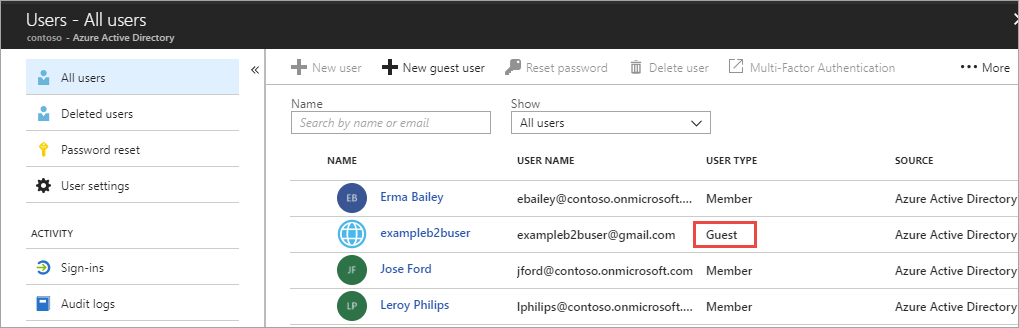
After you send the invitation, the user account is automatically added to the directory as a guest.
Add guest users to a group
If you need to manually add B2B collaboration users to a group as an Azure AD administrator, follow these steps:
- Sign in to the Azure portal as an Azure AD administrator.
- In the navigation pane, select Azure Active Directory.
- Under Manage, select Groups.
- Select a group (or click New group to create a new one). It's a good idea to include in the group description that the group contains B2B guest users.
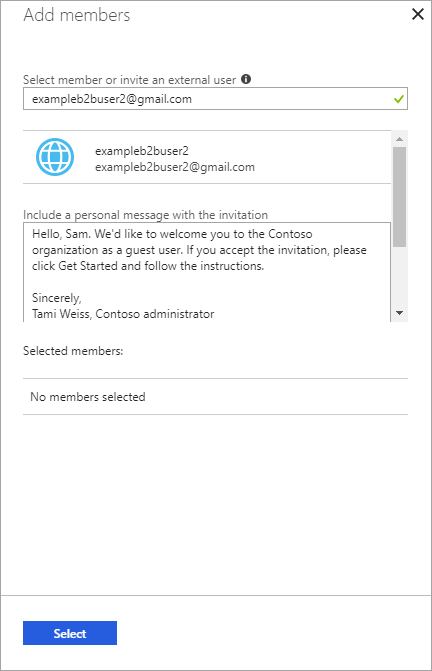
- Select Members.
- Do one of the following:
- If the guest user already exists in the directory, search for the B2B user. Select the user, and then click Select to add the user to the group.
- If the guest user does not already exist in the directory, invite them to the group by typing their email address in the search box, typing an optional personal message, and then clicking Select. The invitation automatically goes out to the invited user.
Add guest users to an application
To add B2B collaboration users to an application as an Azure AD administrator, follow these steps:
- Sign in to the Azure portal as an Azure AD administrator.
- In the navigation pane, select Azure Active Directory.
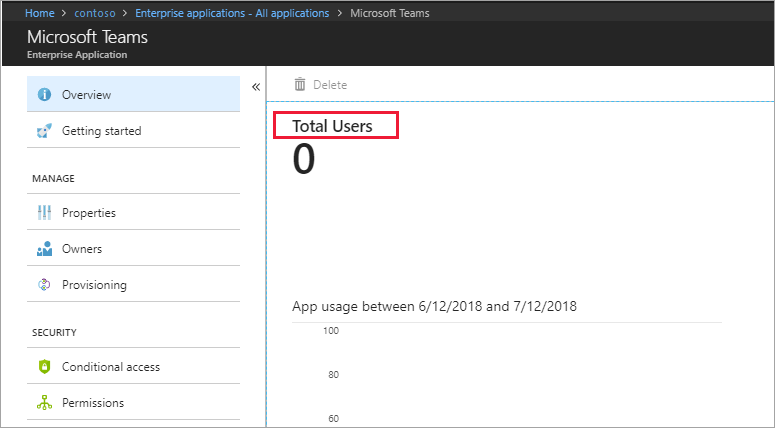
- Under Manage, select Enterprise applications > All applications.
- Select the application to which you want to add guest users.
- On the application's dashboard, select Total Users to open the Users and groups pane.
- Select Add user.
- Under Add Assignment, select User and groups.
- Do one of the following:
- If the guest user already exists in the directory, search for the B2B user. Select the user, click Select, and then click Assign to add the user to the app.
- If the guest user does not already exist in the directory, select Invite.
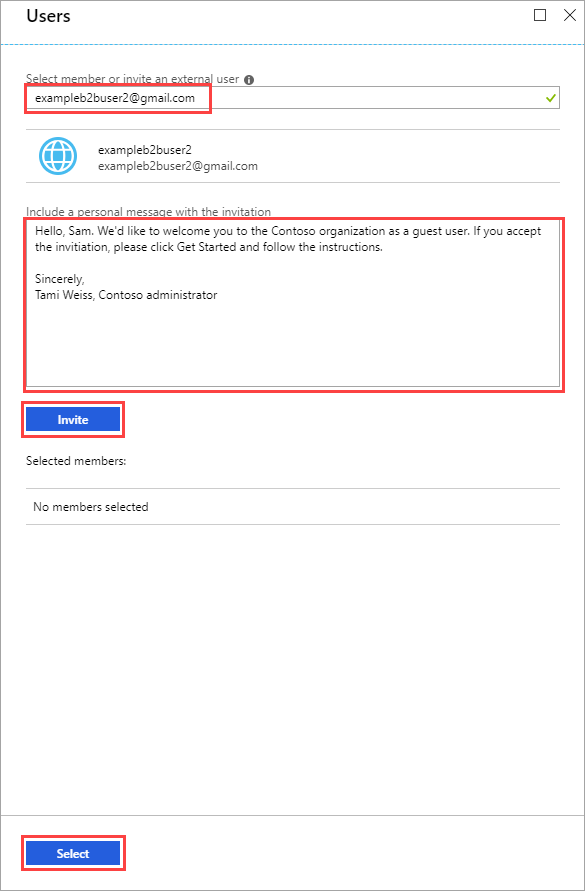 Under Invite a guest, enter the email address, type an optional personal message, and then select Invite. Click Select, and then click Assign to add the user to the app. An invitation automatically goes out to the invited user.
- The guest user appears in the application's Users and groups list with the assigned role of Default Access. If you want to change the role, do the following:
- Select the guest user, and then select Edit.
- Under Edit Assignment, click Select Role, and select the role you want to assign to the selected user.
- Click Select.
- Click Assign.
Resend invitations to guest users
If a guest user has not yet redeemed their invitation, you can resend the invitation email.
- Sign in to the Azure portal as an Azure AD administrator.
- In the navigation pane, select Azure Active Directory.
- Under Manage, select Users.
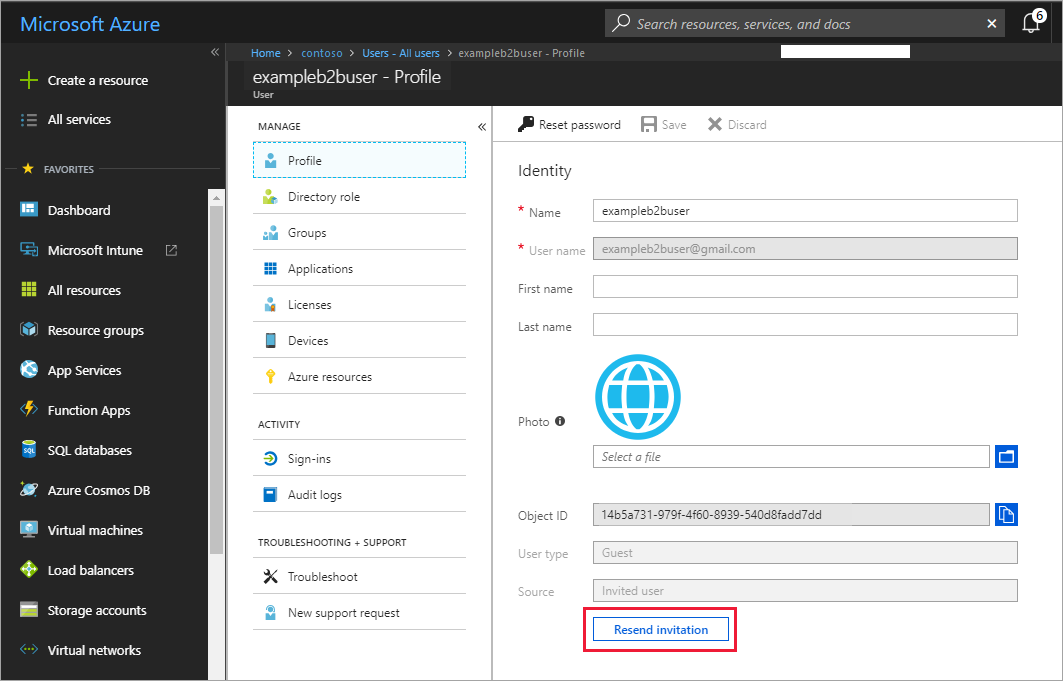
- Select the user account.
- Under Manage, select Profile.
- If the user has not yet accepted the invitation, a Resend invitation option is available. Select this button to resend.


No comments:
Post a Comment